
In order to capture the rough image of the American West, it is necessary to learn its most prominent visual images. There is nothing as classic western headwear that symbolizes the American frontier. Knowing how to illustrate a cowboy hat would place your piece of art in a rustic quality that appeals to the traffic of USA and international enthusiasts of the traditional western culture. You may feel like drawing a rugged rancher of Texas or you may come up with an eye-catching western logo, you must have mastered this particular shape. It may appear to be a bit difficult to put on at first sight due to the curved brim and heavily inlaid crown. But reduced to mere geometric forms, the whole creative process can be made very easy to handle by people who are passionate artists regardless of their capability. Here in this detailed illustration, we will step by step trace out each and every step of the drawing process. You will get to know about the fundamentals of anatomical proportions real directional shading and add those vital realistic rustic details. Take your favorite personal sketchbook and we will begin this thrilling creative adventure together as we successfully learn the artistic aspect of the true culture of cowboys in the USA.
Knowing the Anatomy of the Cowboy Hat.
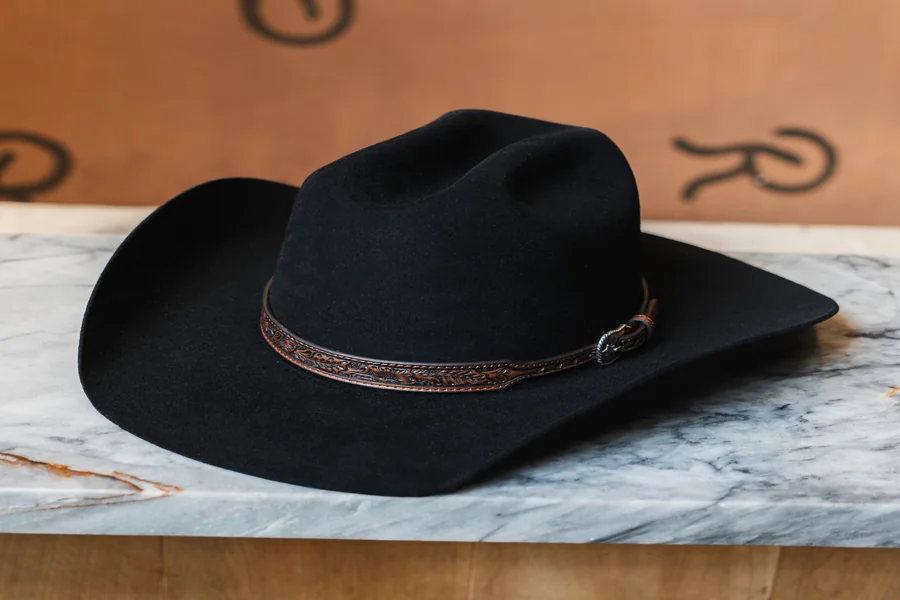
You have to be well aware of what is so unique about this type of headwear before you pick up your sharp pencil and put it to paper. A typical western hat is a hat which is made out of a number of different anatomical features which are harmoniously united to form that well known familiar shape. Then there is the main crown that happens to be the tall high part that is firmly seated above the human head. In most of the traditional American styles, there is a deep dent or sharp crease in this particular top. The most popular and most common type of crease is the classic cattleman crease worn regularly at the local USA rodeos or loud country music concerts around the United States. Then there is the broad protecting cap, which curves violently incurably up on the sides and drops down a little in the extreme front and back. The broad brim gives much needed protection of shade against the blazing mid-day sun on the lengthy dusty cattle drives. And lastly is the ornamental stylish hatband that continuously rounds the bottom of the crown that is tall in nature. This particular band may either be plain tanned leather or may have complex shiny silver buckles and tribal weaves. The knowledge of these separate structural elements goes a long way in assisting you in visualizing mentally a complex three dimensional structure prior to even setting your very first line. When you are perfectly aware that the underlying parts will be organically linked to make your end western drawing appear far more believable and structurally sound, in the eyes of any common beholder.
Assembling Your Basic Supplies of Art.
The possession of the right drawing equipment is simply huge when you are proactively taught on how to draw a cowboy hat. There is no need whatsoever to have a professional studio environment to constantly record great artistic output. The cheap generic drawing pencil of graphite will be more than fine with your light preliminary guidelines and crude concept drawings. A great number of more experienced artists will choose to use a common HB pencil first to do the rough outlines that are faintly made since it can be erased with an amazingly smooth texture and it does not leave any lasting impact on the fragile paper texture. When you want to get deeper darker shadows and deeper stark visual contrasts in the future you would prefer a much softer graphite pencil such as a 2B or a dark 4B. An effective dependable rubber eraser is simply necessary because you will certainly need to take pains to remove simple construction lines as your masterpiece artwork continues to develop so fast. The soft kneaded rubber erasers are indeed remarkable since one can simply shape them with his warm fingers in order to remove dark graphite in very small areas of specific details. In case you desire the appearance of a perfectly smooth blended look to the classic smooth felt material, then you may consider getting a cheap rolled tortillon or paper blending stump. Normal medium-weight sketch paper gives sufficient texture to the surface that holds the loose graphite in place and still allows one to use smooth advanced shading methods easily. A good sharp metal sharpener is also in-store since crisp sharp details demand a very fine pencil point when taking their time on the delicate hatband or other tiny leather stitching details.
The procedure to sketching the crown step by step.
To begin western drawing, it is natural to have a massive foundation of structural base. Take a plain piece of light oval on the horizontal and place it near the dead centre of your blank paper and this oval should be horizontal and simple. Draw this oval very lightly to be able to change the basic shape in the future, whenever necessary. Out of this bottom base oval come two straight vertical lines which spread upwards to very well establish the outer sides of the main tall crown. The very crown is hardly ever entirely flat in the real western ranch attire. Rather make a smooth curvy soft line between the two vertical sides but with a deep grove obviously left in the very center. This is the ideal signature top crease in the form of a top dip. To create the appearance of the top crease as being very realistic, two small curved lines that run back off the front dip to heavily imply the dents on the side fingers. These particular manual marks provide the hat with rough aesthetic characteristics and make it evident that this hat is worn by a true-to-life cowboy. Be extremely attentive to the height of the crown generally in a vertical direction as against the width of the oval base in a horizontal direction. When the top crown is drawn too tall it could end up looking like a cartoonish exaggerated joke but on the other end the crown which is drawn too short will completely lose the iconic tall Texas cattleman look. Bring your own time slowly perfecting these light preliminary forms till the fundamental overall proportions seem to be absolutely right.
How to Make the ideal Curved Brim.
The most visually defining western characteristic is arguably the wide brim and is usually the most basic part that is difficult to draw in right by a new beginner. It strictly demands a working knowledge of visual spatial perspective as a basic solid working knowledge since the long brim dramatically turns outward and out of the watcher. Begin with a much larger horizontal oval that is well drawn all around your original central base oval. It is a bigger outer oval that is rationally the ultimate outer boundary of a flat shaped raw brim. Now it is time to add the signatory sweeps of the west. Bend the left and the right sides of this great outer oval sharply up towards the open sky. The top front of the broad brim ought to bend a little downwards directly into the eye of the beholder. The rear of it needs to curve downward as well though it will rationally be partially concealed directly behind the high solid crown form. Deliberately remove the flat horizontal outer oval lines which you had previously used as a drawing guide leaving only the sweeps of dramatic curvy lines. In order to provide the drawn brim with the realistic physical depth and thickness, there is a need to draw the second parallel line which is thin and placed closely to the entire outer edge. This infinitely tiny visual aspect is in active operation that does not allow the hat that is being drawn to appear like it is constructed of delicate copy paper. The manner in which the outer brim sharply curves fully determines the attitude of the cowboy hat that is stylistic in nature. Another tight high sharp side roll seems like a perfect fit to a modern sports USA bull rider but a wide sweeping gentle one appears more like a historical nineteenth century working cattleman.
How to Wear the Various Cowboy Hats.
The huge exciting western headwear market is not only a single generic rigid shape. When you are certain of how to sketch a cowboy hat in the simple standard design that you can easily draw without much danger, you can safely begin to experiment with the different attractive regional USA designs. The classic well known ten-gallon hat as an example has an exaggerated top crown with an absurdly tall height that immediately draws the attention of the viewer. Although this exaggerated tall stylistic design was somewhat historically inaccurate to the real life working cowboys of that time, it is a very popular visual staple in old time western films and the traditional American pop culture. At the other extreme of great styling scale is the low profile buckaroo hat typically much preferred by working cowboys in the large Great Basin region. These are incredibly unique hats with all-flat wide rigid brim, and a very shallow low flat crown. The next type of variation of the crease, which is the most popular in the USA, is the dramatic aggressive pinch front crease. Rather than a long continuous indent on the middle of the front of the crown is sharply pinched at a point of distinct triangular sharp teardrop shape as vehemently seen directly downwardly by the eye. It is possible to quickly produce various distinct western characters by modifying these particular fundamental shapes extensively. A gritty dangerous outlaw who is rugged would have a squashed asymmetrical ruined hat and a person who is wealthy and has achieved a lot of success in life would have a perfectly symmetrical clean felt hat, which is clean. Knowing these nuances of the cultural regional style differences will simply provide immense narrative to your own western painting, as well as feel completely historical.
The inclusion of Naturalistic Shading and Naturalistic Textures.
Shading does well in converting your simple 2D drawing with lines to a realistic popping 3D physical object. The bulk of the high end cost USA western hats are made of heavy tight beaver fur felt or soft rabbit fur felt that naturally possesses a very soft smooth surface finish of the matte. In order to recreate the visual texture of this particular high quality fabric the last thing that one must avoid at all costs is the use of heavy contrasting lines of pencil. Rather than being strictly smooth soft light gradients with soft graphite mixtures. Before proceeding to any further step, you must firstly clearly find out where exactly your imaginary source of light is. When the intense sunshine is shining at the top left side the right side of the tall crown and the bottom side of the left wide brim will fall naturally into deep dark heavy shadow. The sunken middle finger folds upon the upper crown will always be forever filled with the absolute black shadows. This is done by putting your soft graphite as softly as possible over these low spots of recession and then letting it flow in the same direction of the direct light. The large sweeping brim effectively pours a dramatic curved dark shadow at the base of the main crown which is at the lower portion. This particular dark shadow makes the whole structure of the top look and appear as a whole. In the event that you, on the contrary, greatly enjoy having a light weight ventilated summer straw hat to draw your necessary shading method will forever have been altered to an entirely new level. Natural straw woven needs a very textured visual process that is actively developed using rapid interlacing intersecting tiny marks with pencils. The directional woven grass weave should be clearly explicitly pointed out as firmly wrapping around the main crown and perfectly following the active upward movement of the curved side brim. Also remember to darken the leather hatband in a deep shade, smooth and shiny, and maybe give it just a faint touch of bright shiny white in case it is in the form of a metallic silver rodeo buckle which is visible.

Staining Your Cowboy Hat Drawing with Color.
Although the sharp graphite sketch sketches are definitely possessing certain certain vintage appeal with the added bright vibrating color giving a complete artistic western drawing sense. When you have the boldness of officially resolving to go far beyond the basic black and white you soon enter into a giant thrilling new universe of artistic brilliant creative possibilities. Most of the conventional authentic western felt hats are typically in a very warm and natural color such as dark chocolate brown warm golden tan rich neutral taupe and classic stark solid black. As a method of designing a visual colouring of these particular natural soft felt materials, using sharp colour pencils or more advanced computerized digital painting programs always begin with a very thin solid smooth base, of your main selected starting colour. Gradually and with much caution develop the darker shadow areas of the picture visually with slightly colder and darker colors instead of merely adding pure harsh stark black lazily. To a warm golden tan hat a distinct attempt is evidently made by deep rich burnt sienna or dark earthy umber to be used in the deep crease shadows. When you are painstakingly applying the crisp bright white or light shiny silver hat in a particular manner, namely, by very pale cool soft blues and soft subtle gentle grays, to clearly define the curved complex three-dimensional volume, you simply do not want to darken the bright hat all the way over to the other end, in the process of doing it. The woven bright summer straw hats are simply wonderful with the several layers of warm sunny yellow pale sandy ochre and light bright golden brown overlapping the color on the hat. An easy quick blitz of bright colored shock can also be injected easily by merely designing a very decorative bright colored hatband in a very specific manner. The bright neon turquoise blue or deep dark crimson red leather hatband actually gives a direct impact of a stunning gorgeous appearance of bright contrast against the dull quiet earthly natural hues of the main large hat body.
Details of the Western Hats that Are Prone to error.
This particular iconic western subject matter sometimes quickly gives rise to irritating frustrating trouble even to the most seasoned talented professional artists when he/she overloads it. The one most common visual error in itself, is a complete flattening of the complicated visual viewpoint. As soon as amateur novice artists sketch the broad brim absolutely parallel to it, the latter loses all physical spatial depth and the appearance of the former is absolutely unnatural. Never to forget that the big hat structurally entirely rests on a naturally rounded human head so the bottom base oval is obliged to be realistically organically curved downward in the absolute front. The next very incredibly frequent error in drawing that can be seen is that of making the soft organic felt seem too stiff or too stiff indeed like hard molded plastic of low quality. The organic very subtle fine folds and minor beautiful physical defects are found in the natural woven fabric and worn premium felt. The presence of a small minuscule small touch of visual random asymmetry, in fact, actually helps to give the entire final illustration a lot more visual grounds and makes it look entirely realistic. Other beginners too fail to draw the bottom of the inside of the brim, that is still concealed, perfectly in view at the very rear of the hat. The sides being so boldly rolled in an aggressive manner up, the bottom underside curve will absolutely certainly be seen going behind the main tall crown. It is quite impossible to overlook this important structural anatomical point and go straight into the visual illusion of actual three-dimensional physical space. And lastly pray never to describe the whole finished detailed hat in one heavy thick dark black line. This is not the case with the real natural physical objects, which in real nature do not have any thick dark black outlines. Instead, naturally arrange the smooth contrast between soft bright light and dark shadow to perfection to the beautiful edges of your artwork in the natural way.
Frequently Asked Questions
In what angle should a cowboy hat be drawn in? The most perfect smart option in any case is a dynamic three-quarter slightly angled view, when the enthusiastic new beginner is grappling with learning how to draw a cowboy hat. It is clearly beautifully illustrated by the display of the front central deep crease, the dramatic high side roll, the full physical deep depth of the tall crown, on the one hand at a single once. A direct full frontal flat perspective is often infamously insanely difficult due to the visual perspective that causes the entire rear of the brim to be out of sight that unfortunately utterly flattens what fervent effort you had been putting into your labor.
But how do I go about making the hat look like it fits in one of the character heads? You ought certainly to take a thorough time to outline before you even begin to trace roughly the big hat, a simple anatomical round spherical form of the human head in its entirety. The bottom of the main crown round base should entirely follow the natural curved curve of the human skull that should be comfortably placed at the position of slightly less than one inch just over the human eyebrows directly on the forehead. This is a vital basic trick that fully guarantees the structural overall proportions correctly fit a real living human body otherwise the heavy hat may appear strangely as it is unnaturally flying high above the character drawn.
Is it safe to strongly apply black dark ink in place of normal soft pencil in the drawing? Definitely you can certainly safely use black dark permanent ink. Dark permanent ink is really extraordinarily marvelous to be utilized in a proactive manner so as to create striking bold illustrations with high contrast of the traditional western style. You will certainly have no hesitation in employing old traditional hatching and prudent deliberate cross-hatching drawing to vigorously gradually accretion of the dark heavy shadows because you simply cannot easily blend wet sharp ink with the soft dry graphite in a gradual and smooth manner. You must begin with a very light gentle pencil drawing first and very carefully ink on your surest bold pencil lines.
What precisely is it specifically about a famous Stetson that makes it physically distinct among the other conventional styles? Stetson is an extremely high-tech historical brand name that technically is entirely synonymous with the general American western style but they were the historical pioneers of the iconic classic design of the Boss of the Plains flat hat. This primitive early historical rough design had a top crown which was entirely high rounded and was uncreased, as well as a totally completely flat unrolled wide brim. Today the majority of ordinary everyday modern individuals firmly automatically connect the well known iconic name directly to the classic indented cattleman crease and the heavily rolled side brim style that is heavily prevalent to the modern USA professional rodeo wear.
What do I do successfully to attract a fully exhausted or disgustingly battered cowboy hat? It is an amazingly great deep visual narrative about the rugged American frontier, and old heavily worn vintage hats narrate it. To successfully successfully accomplish this rugged tough western appearance, it is required that the outer wide brim be drawn subsequently a bit knowingly uneven, and physically ragged. Add very dark messy scattered lines and make them active so as to visually depict the dry ground dirt and gross sweat stains that are heavy and entirely pool at the bottom of the leathers in the tight hatband. The main central crease on the top can also be easily made to appear much more pleasing to the eye, and also somewhat a lot less hard altogether, as though the old soft felt had lost completely on its own permanent hard stiff factory form, during long hard strenuous years of hard work in hot Texas ranch work, a lot of which would have been intensive.
Final Thought
The very specific art of knowing how to sketch a cowboy hat in a way that will last, that is, be the best, certainly requires some quiet and much daily practice but the end artistic aesthetic outcome is one that is exceedingly high rewarding. With cleverly judicious dissection of the complex highly recognizable western form into simple very simple round ovals and smooth dynamic curves of which one can easily master completely this is indeed an iconic beloved western symbol. Never forget to give the mercilessly exquisite visual attention to the structural basic connection between the high creased crown and the sweeping very rolled brim. Considerable deep directional shading will indeed entirely bring your 2D flat image to life as beautiful as possible in full vibrant color and with that hyper realistic feel or touch of the hyper authentic premium natural straw. Never, ever, be too much troubled about the fact that your early, first, crude, appearances may be physically unappealingly unrealistic. Each of these crude daily sketches really actually conveys to you something completely new and most of all precious, of the visual accurate perspective, and physical solid shape. Always have your wooden drawing pencils as incredibly sharp as you can and continuously vigorously drill in those intricate beautiful sweeps of lines. It will not be long before you are positively sure that you are with no hesitation at all dragging perfect beautiful rustic western headwear with your fingertips and that you are perfectly competently making the most of any rugged tough cowboy portrait or vast big beautiful frontier landscape you can think of.